So Scandinavian pink Annie Sloan, two coats; clear wax, one coat, dark wax, one coat.


 |
| Little mantel clock covered with vintage music pages and overlayed with napkin images. I have steam punked this clock by removing the none working parts adding a new quartz movement and reusing parts I could for a steam punk effect. |
 |
| Vintage brush and mirror set decorated with black lace paper napkin |
 |
| Small hip flask decorated with the lace paper napkin |
 |
| Hip flask in lovely peacock paper napkin |
 |
| Small vintage cigarette case once again covered with peacock paper napkin. All for sale in my Folksy Shop! http://folksy.com/shops/HouseofFfion |
 |
| This is the poor table to be made over! Yes the marks you can see are bite marks made by our little dog when she was teething! She started her furniture design hobby early! |
 |
| Oh yes and the cats do love to sit on it too! |

 |
| So Bite marks still evident of course but now the distressed look is enhanced by the Annie Sloan paint- a mixture of 1 part Chateau Grey and 1 part of Old Ochre |

 |
| Clafoutis in the making! |
 |
| So this is a collection of unloveds waiting for a makover! The one on the right turned into my round the world clock as seen in an earlier post. I am currently deciding what to do with the tall one on the right- just waiting to find the right book/paper/ |
 |
| So this one I forgot to photograph before I took the ugly finials off it and replaced the face but gives you an idea of starting condition- the finished result is a bit further on in this post.... |
 |
| This large china cheese cover has been hanging around for ages waiting for the right paper to come along- I often find this actually. I have an idea how I would like it to look and eventually it all works out! So this lovely is very chipped and has lots of crazing and hairline cracks- I used the paper napkin technique to cover these blemishes and then lashings of varnish to cover and protect. I really love it! |

 |
| This was my first paper napkin decoupage project- an old sewing machine drawer. I really love peacock design and this was so handy on the coffee table. I painted the inside of the drawer with Annie Sloan and distressed it. |
 |
| Here is my peacock beauty! Such a change from the black one earlier. |
 |
| I added a lovely vintage style image to the inside. |
 |
| I used Distress Ink to add an aged effect which I think really enhances this clock. |


 |
| This little lovely is so rich and vintage looking Again using paper napkin technique. I really love using paper napkins, it is a challenge but there are so many lovely napkins to choose from and I love the texture they give. |

 |
| And then there was this one! I love this one again in peacock- I had to replace the movement and really overhaul this clock. So far the sewing machine drawer, the large peacock clock the one above have sold on my Folksy shop- Houseofffion! I do hope that the new owners are happy with their purchases as I love all my clocks. What do you think? Also I am always on the look out for vintage/old lovely new papers/images to use on my clocks, and always on the look out for clocks wanting a makeover! |
 |
| There once was a little clock that didn't work and had a dirty face....... |
 |
| It's top and bottom were removed.... these clocks are assembled in much the same way- removing the feet and nuts at the top releases the top and bottom. |


 |
| This allows the door and glass to be removed |

 |
| Often the faces are held in place with sticky pads. This clock didn't work so I removed the hands |

 |
| and the paper face- removing the clock movement is a bit of a challenge but eventually comes away..... |

 |
| the clock in pieces ready for a new life! |
 |
| I added a brand new quartz movement... |
 |
| I used an image from Graphics Fairy ( the front of a photo album) and placed a clock face within the image- I photocopied this ..... |
 |
| and added it to the clock. I fitted the new hands.... |
 |
| Now it was time to start covering the clock... I used pages from books and printed images to decorate the frame. |


 |
| removing the handle helps to give a clean finish to the top.... |

 |
| Remember to keep all the small bits safe in a little pot..... |
 |
| Top, bottom and door... |
 |
| Top bottom and door after revamp..... |
 |
| I like to add a small detail to the handle. |
 |
| Reassembled and ready for more embellishment |
 |
| The theme for this was 'Spring'- as the receiver of this gift likes Pre- Raphaelites I used pictures in this style to depict the Spring theme |
 |
| I like to add detail to the base... |

 |
| I added some lovely pictures to the sides and top- I used a boarder from an old book to decorate the front of the clock. |
 |
| I then added a good few coats of varnish to protect the whole thing.. |

 |
| I added a cutting from an old dictionary to the inside of the door... |

 |
| The finished item |
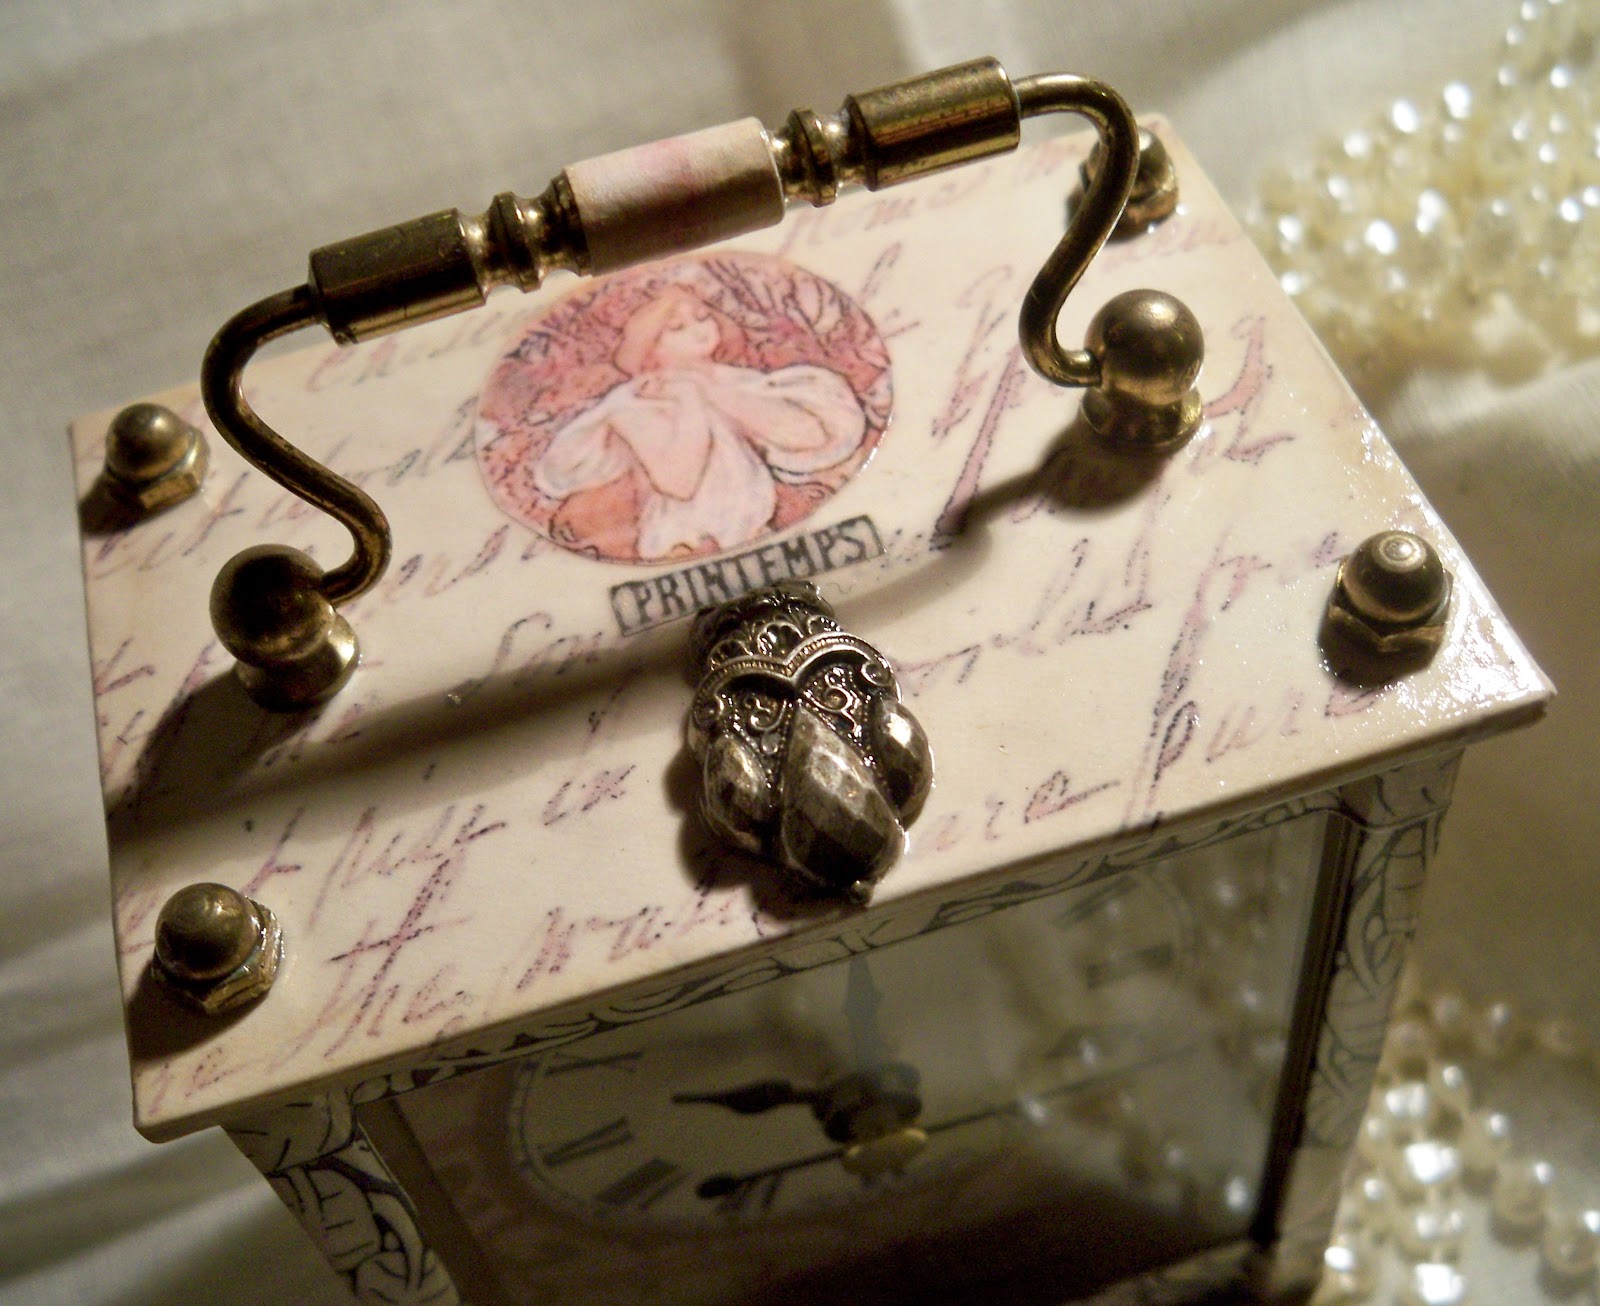 |
| This little metal embellishment I think adds to this little clock- I had it in a box of items of spares for repairs - the Mucha design for 'Spring' 'Pritemps' reminds us of the Spring theme. |


 |
| I hope my swap partner likes this as much as I do????? |
